How To Install Arduino IDE
Modules Usage Tutorial
- How To Install Arduino IDE
- Tutorial I: Motor With Encoder Control Demo
- Tutorial II: Motor Without Encoder Control Demo
- Tutorial III: ST3215 Serial Bus Servo Control Demo
- Tutorial IV: PWM Servo Control Demo
- Tutorial V: IMU Data Reading Demo
- Tutorial VI: SD Card Reading Demo
- Tutorial VII: INA219 Voltage And Current Monitoring Demo
- Tutorial VIII: OLED Screen Control Demo
- Tutorial IX Lidar and Publishing Lidar Topics in ROS2
- UGV01 WIKI Main Page
- General Driver for Robots WIKI Main Page
Install Arduino IDE
-
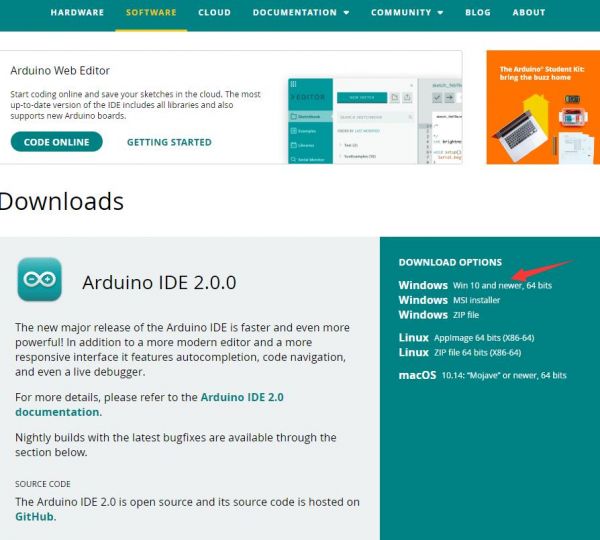
Download the Arduino IDE installation package from Arduino website.
-
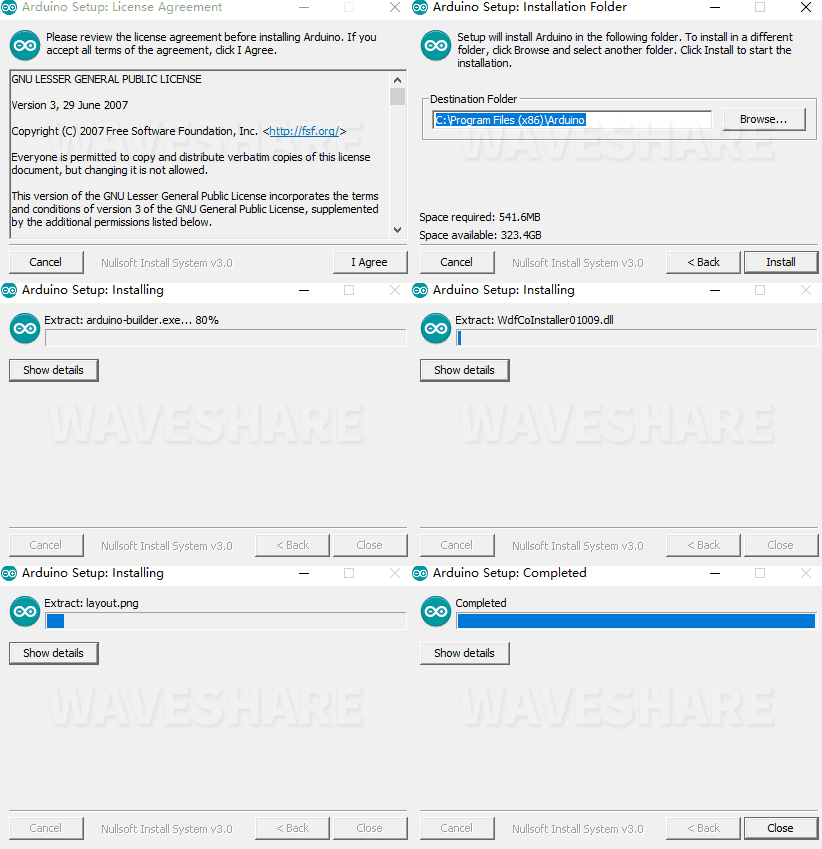
Click to install after downloading.
-
Note: You will be prompted to install the driver during the installation process, we can click Install.
Install ESP32 Plug-in In Arduino IDE
-
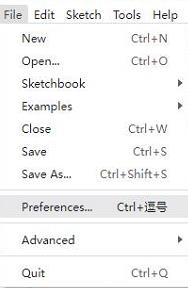
Open Arduino IDE, click the File on the left corner and choose "Preferences".
-
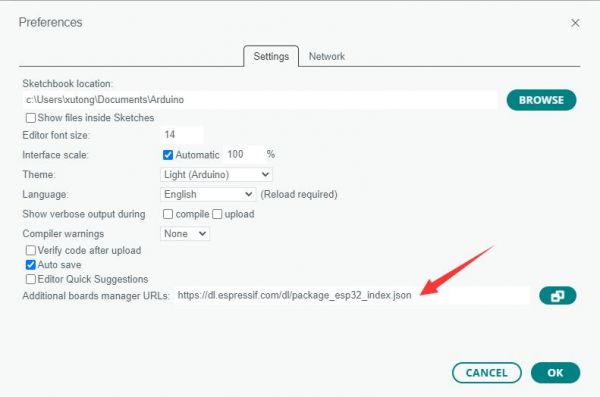
Add the following link in the additional development board manager URL, then click OK.
https://dl.espressif.com/dl/package_esp32_index.json
Note: If you need to add multiple development board URLs, you don't need to delete the URL for ESP32 development board support. You can directly add other URLs on another line. By default, URLs will be displayed separated by commas.
For example: If you need to add the URL on the ESP8266 development board, simply add the additional URLs on separate lines, and it will display as follows:https://dl.espressif.com/dl/package_esp32_index.json, http://arduino.esp8266.com/stable/package_esp8266com_index.json
3. Click to download ESP32 development package and unzip. Input the following path on "my computer":C:\Users\username\AppData\Local\Arduino15
The "username" needs to be changed according to your computer's username. Create a new folder named "packages" and copy the extracted folder of the ESP32 development package into the "packages" folder.
You can see that the installed ESP32 development board version from "packages-esp32-hardware-esp32" is version 2.0.11, which matches the version required for the open-source demo development board ESP32 of the WAVE ROVER, UGV01, and UGV02.Install Dependency Library
Download libraries, unzip them and open the Arduino IDE. Select "File" -> "Preferences" on the top left corner to view the default installation path of the dependencies libraries: C:\Users\username\Documents\Arduino. In that path, create a new folder called libraries, and copy the folder shown in the figure into the new libraries folder.

Upload Demo
Here we take the WAVE ROVER demo as an example. After you develop the demo, you can upload it to the General Driver for Robots driver board by the following methods.
-
Download the demo, unzip it and double-click to open WAVE_ROVER_v0.9.ino. Please note that all files are under the same file folder.

-
Click Tool -> Port, remember the existing COM, and do not click this COM. (There are different COM ports in different computers, and you need to remember the existing COM in your computer.)
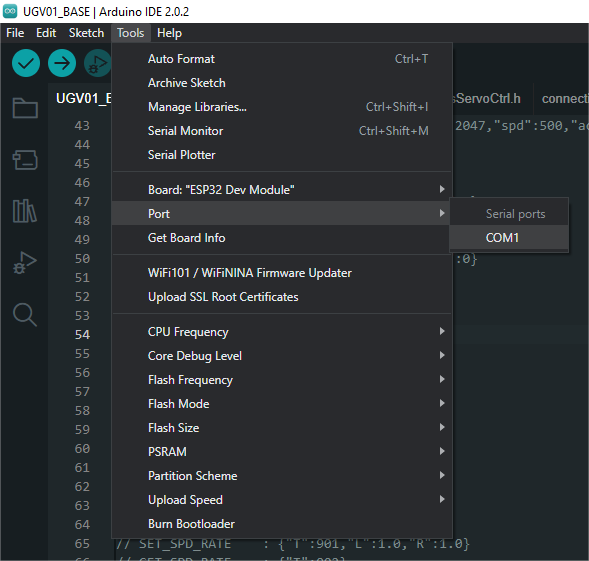
-
Connect the driver board to the computer with a USB cable, click Tools -> Port, and click the newly-appeared COM.
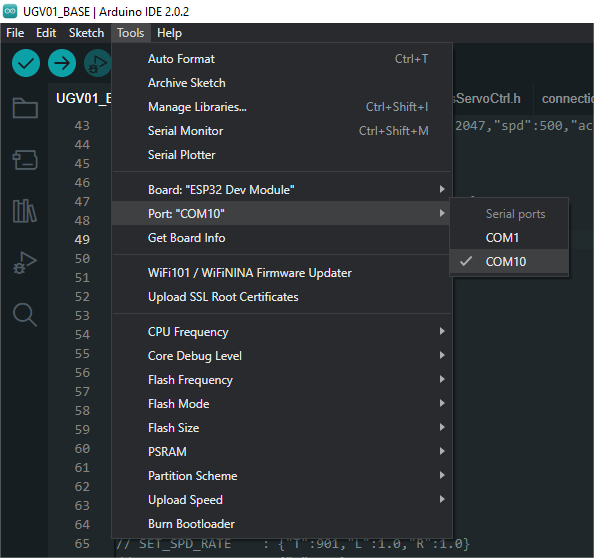
-
Click Tool -> Development board -> ESP32 Arduino -> ESP32 Dev Module.

-
After setting, you can click Upload to upload the demo to your device.

- If you encounter problems during the period and need to reinstall or change the Arduino IDE version, you need to uninstall the Arduino IDE after uninstalling the software. Then, you need to manually delete all the contents of the folder C:\Users[name]\AppData\Local\Arduino15 (Need to display hidden files to see) and then reinstall.
-
Download the demo, unzip it and double-click to open WAVE_ROVER_v0.9.ino. Please note that all files are under the same file folder.
