
Template: Tilt Sensor Pico Guide
From Waveshare Wiki
Get Started at Pico
Pico Quick Start
Download Firmware
- MicroPython Firmware Download

- C_Blink Firmware Download

Video Tutorial
- Pico Tutorial I - Basic Introduction
- Pico Tutorial II - GPIO
- Pico Tutorial III - PWM
- Pico Tutorial IV - ADC
- Pico Tutorial V - UART
- Pico Tutorial VI - To be continued...
MicroPython Series
- 【MicroPython】 machine.Pin Function
- 【MicroPython】 machine.PWM Function
- 【MicroPython】 machine.ADC Function
- 【MicroPython】 machine.UART Function
- 【MicroPython】 machine.I2C Function
- 【MicroPython】 machine.SPI Function
- 【MicroPython】 rp2.StateMachine
C/C++ Series
Arduino IDE Series
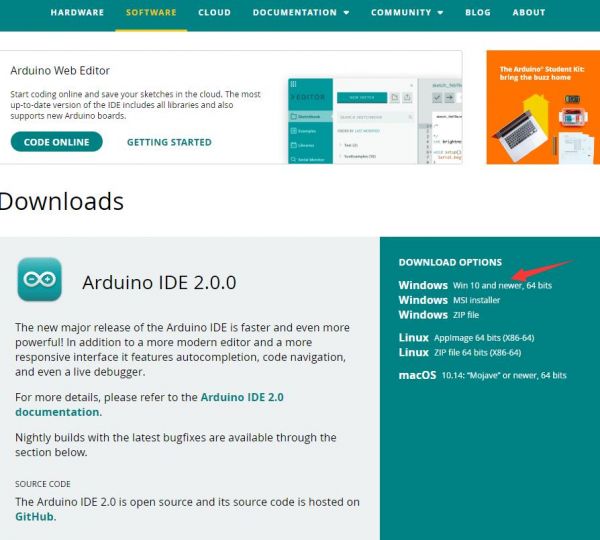
Install Arduino IDE
-
Download the Arduino IDE installation package from Arduino website.
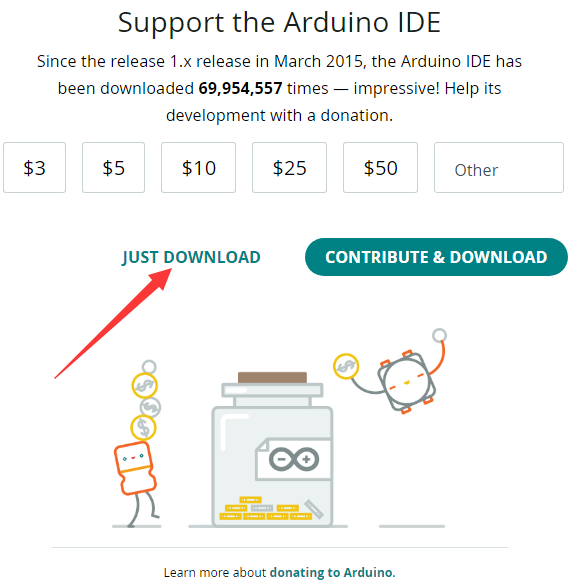
-
Just click on "JUST DOWNLOAD".
-
Click to install after downloading.
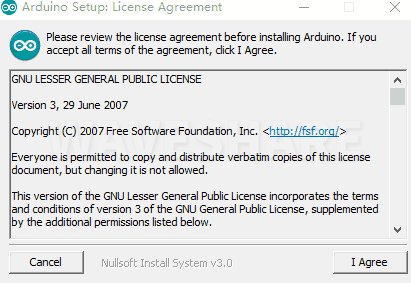
-
Note: You will be prompted to install the driver during the installation process, we can click Install.


Install Arduino-Pico Core on Arduino IDE
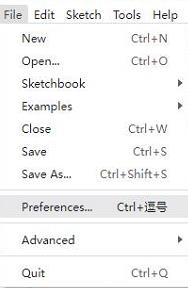
-
Open Arduino IDE, click the File on the left corner and choose "Preferences".
-
Add the following link in the additional development board manager URL, then click OK.
https://github.com/earlephilhower/arduino-pico/releases/download/global/package_rp2040_index.json
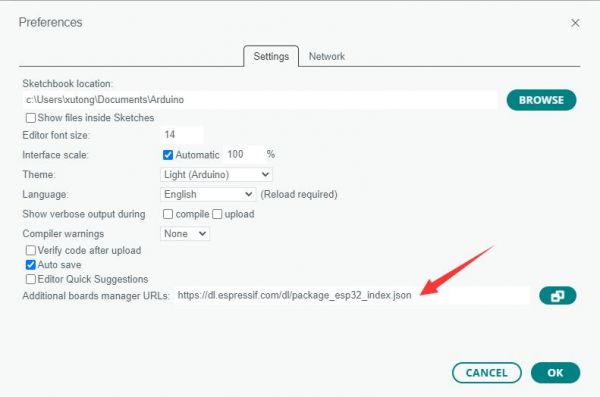
Note: If you already have the ESP8266 board URL, you can separate the URLs with commas like this:https://dl.espressif.com/dl/package_esp32_index.json,https://github.com/earlephilhower/arduino-pico/releases/download/global/package_rp2040_index.json
-
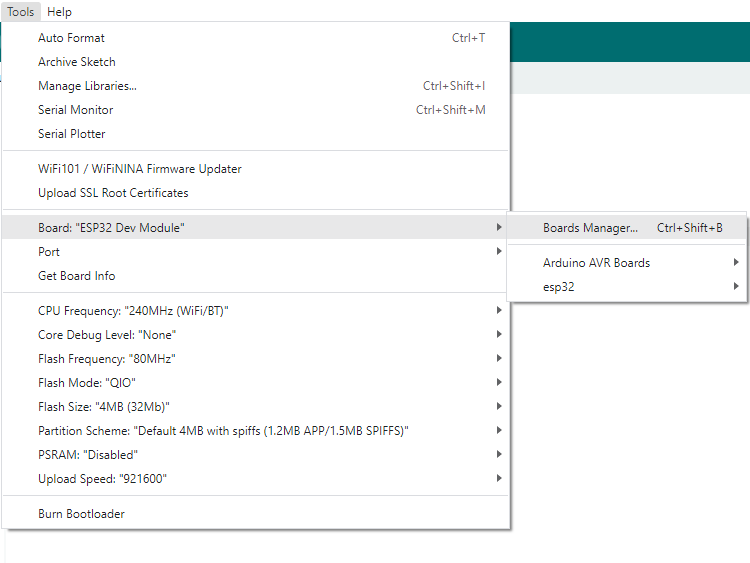
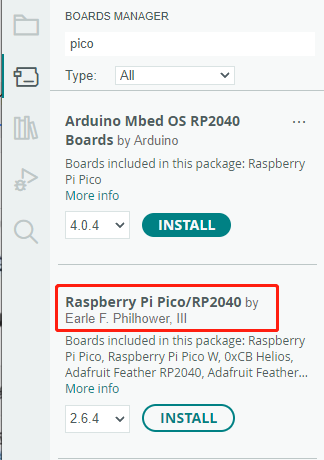
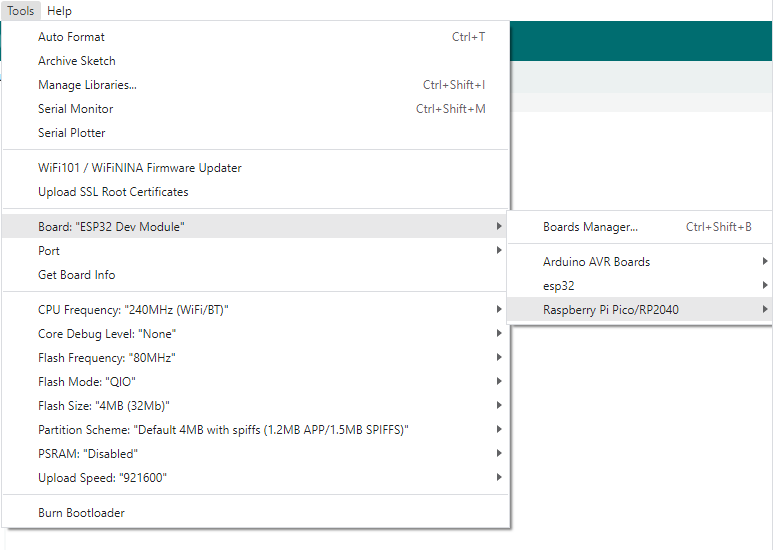
Click on Tools -> Dev Board -> Dev Board Manager -> Search for pico, it shows installed since my computer has already installed it.


Upload Demo At the First Time
-
Press and hold the BOOTSET button on the Pico board, connect the Pico to the USB port of the computer via the Micro USB cable, and release the button when the computer recognizes a removable hard drive (RPI-RP2).
- Download the demo, open arduino\PWM\D1-LED path under the D1-LED.ino.
-
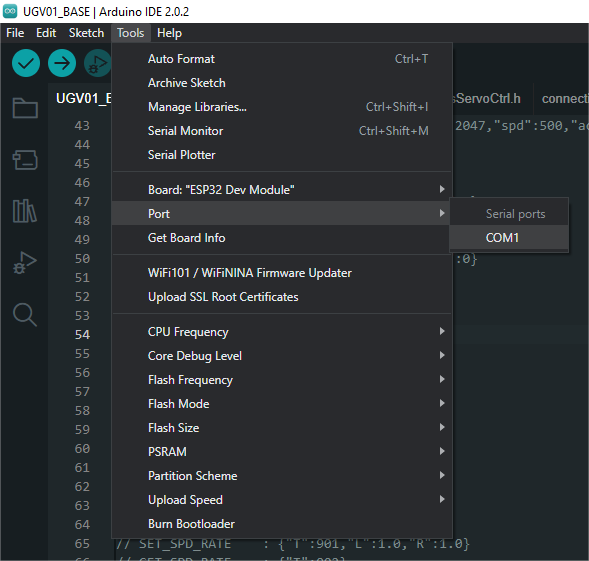
Click Tools -> Port, remember the existing COM, do not need to click this COM (different computers show different COM, remember the existing COM on your computer).
-
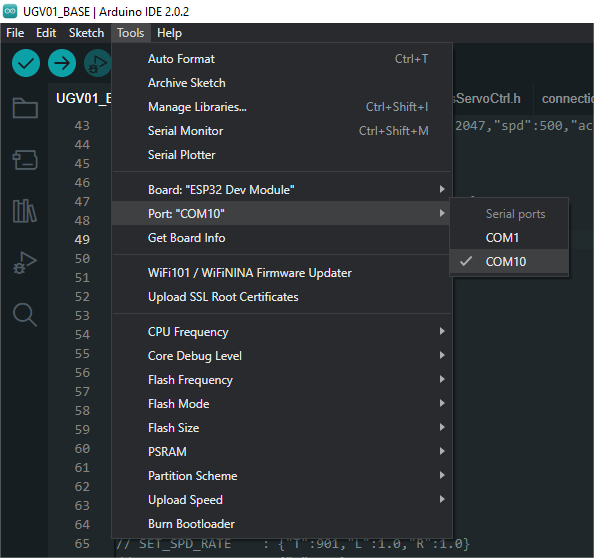
Connect the driver board to the computer with a USB cable, then click Tools -> Ports, select uf2 Board for the first connection, and after the upload is complete, connecting again will result in an additional COM port.
-
Click Tool -> Dev Board -> Raspberry Pi Pico/RP2040 -> Raspberry Pi Pico.
-
After setting, click the right arrow to upload.
- If you encounter problems during the period, you need to reinstall or replace the Arduino IDE version, uninstall the Arduino IDE needs to be uninstalled cleanly, after uninstalling the software you need to manually delete all the contents of the folder C:\Users\[name]\AppData\Local\Arduino15 (you need to show the hidden files in order to see it) and then reinstall.


Open Source Demo
- MicroPython Demo (GitHub)
- MicroPython Firmware/Blink Demo (C)
- Official Raspberry Pi C/C++ Demo
- Official Raspberry Pi MicroPython Demo
- Arduino Official C/C++ Demo
Hardware Connection
| Sensor | Pico | Description |
|---|---|---|
| VCC | 3.3V | Power input |
| GMD | GND | Power ground |
| DOUT | GP22 | Digital output |

Download examples
Use the Raspberry Pi as the host device. Open a terminal and run the following commands to download the example.
sudo apt-get install p7zip-full
cd ~
sudo wget  https://files.waveshare.com/upload/b/b6/Tilt-Sensor-code.7z
7z x Tilt-Sensor-code.7z -o./Tilt-Sensor-code
cd ~/Tilt-Sensor-code
cd Pico/c/build/
Examples
C codes
- Go into the c directory.
cd ~/Tilt-Sensor-code/Pico/c/build
- Add the path of SDK.
export PICO_SDK_PATH=../../pico-sdk
- Note that if the path of your SDK is different, you need to modify the command and use the correct path to export
- Generate Makefile and build.
cmake ..
make -j9
- After building, a uf2 file is generated.
- Press and hold the button of Pico, connect it to Raspberry Pi then release the button.
- Copy/Drag the uf2 file to the portable disk (RPI-RP2) recognized.
cp main.uf2 /media/pi/RPI-RP2/
Micropython codes
Windows
- 1. Press the BOOTSET key on the Pico board, connect the Pico to the USB port of the PC with a Micro USB cable, and release the button after the computer recognized a movable disk (RPI-RP2).
- 2. Copy the Rp2-pico-20210418-v1.15.7z file from the Python directory to a recognized removable disk (RPI-RP2).
- 3. Open the Thonny IDE (Note: use the latest version of Thonny, otherwise there is no support package for Pico, the current latest version for Windows is v3.3.3).
- 4. Click Tools -> Settings -> Interpreter, and select Pico and the corresponding port as shown in the picture.

It also provides a demo.
- 5. File -> Open -> Tilt Sensor.py, click to run as shown below:

Raspberry Pi
- Flash the Micropython firmware first.
- Open the Thonny IDE (Menu->Programming->Thonny Python IDE).
- 【Optiional】If the Thonny IDE in the Raspberry Pi is not the new version that supports Pico, please upgrade it first.
sudo apt upgrade thonny
- Configure Interpreter, choose Tools -> Options... -> Interpreter, choose MicroPython (Raspberry Pi Pico) and the ttyACM0 port.

- Click File -> Open.. and browser the micro python codes (Tilt Sensor.py) to run the codes.
Expected result
- When the module is shaken or tilted, the signal indicator on the module is on, and when the module is placed in parallel, the signal indicator on the module is off.