Template: L76X GPS HAT PI
Working with Raspberry Pi
Provide C and Python demos for Raspberry Pi.
Enable UART Port
Enable the Raspberry Pi terminal and input the following commands to the config interface:
sudo raspi-config
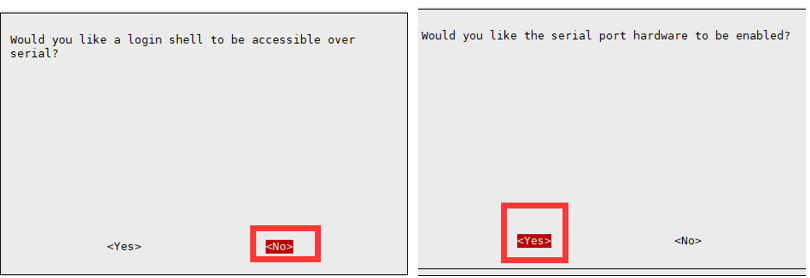
Choose Interfacing Options -> Serial, close shell visit, open the hardware serial port
Install Library
If you use the bookworm system, you can only use lgpio library, bcm2835 and wiringPi can't be installed and used.
BCM2835
#Open the Raspberry Pi terminal and run the following command
wget http://www.airspayce.com/mikem/bcm2835/bcm2835-1.71.tar.gz
tar zxvf bcm2835-1.71.tar.gz
cd bcm2835-1.71/
sudo ./configure && sudo make && sudo make check && sudo make install
# For more, you can refer to the official website at: http://www.airspayce.com/mikem/bcm2835/
WiringPi
#Open the Raspberry Pi terminal and run the following command
cd
sudo apt-get install wiringpi
#For Raspberry Pi systems after May 2019 (earlier than that can be executed without), an upgrade may be required:
wget https://project-downloads.drogon.net/wiringpi-latest.deb
sudo dpkg -i wiringpi-latest.deb
gpio -v
# Run gpio -v and version 2.52 will appear, if it doesn't it means there was an installation error

# Bullseye branch system using the following command:
git clone https://github.com/WiringPi/WiringPi
cd WiringPi
. /build
gpio -v
# Run gpio -v and version 2.70 will appear, if it doesn't it means there was an installation error
lgpio
#Open the Raspberry Pi terminal and run the following command
wget https://github.com/joan2937/lg/archive/master.zip
unzip master.zip
cd lg-master
sudo make install

# You can refer to the official website for more: https://github.com/gpiozero/lg
Python
sudo apt-get update
sudo pip install RPi.GPIO
sudo apt-get install python-serial
sudo apt-get install gpsd gpsd-clients python-gps
Hardware Connection
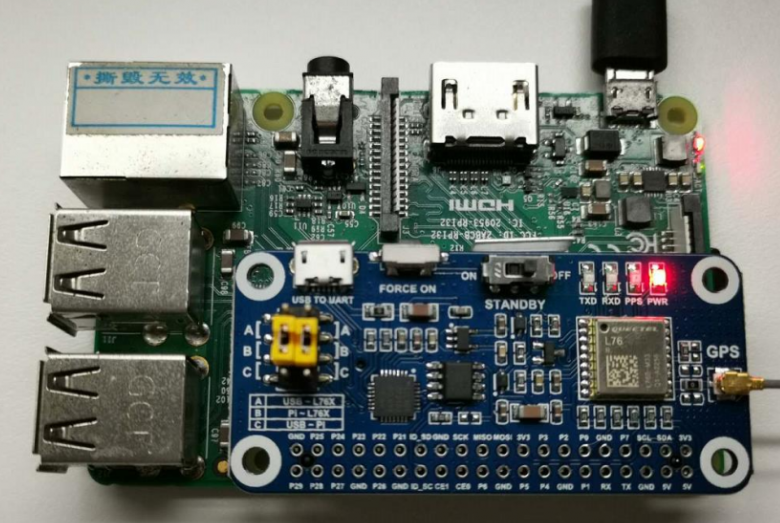
- Directly insert the module into the Raspberry Pi, and connect the yellow jumper cap to the B position.
Minicom Debug
- Install minicom debug assistant:
sudo apt-get install minicom
# For Raspberry Pi 3B\3B+\4B
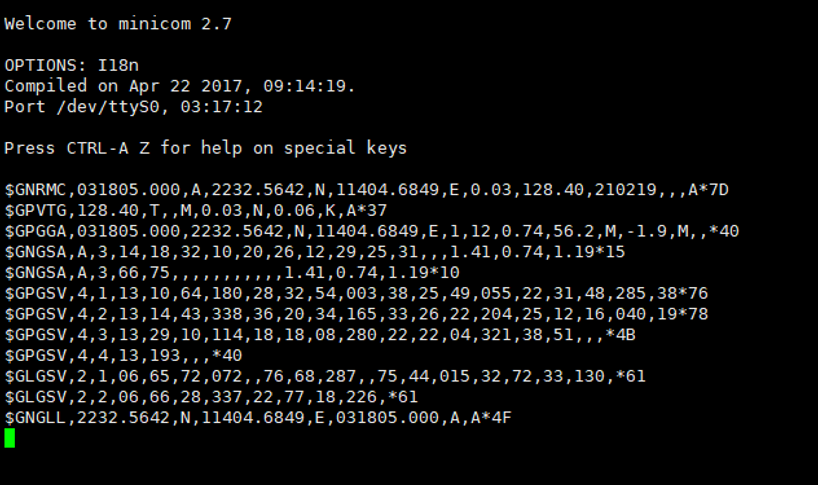
sudo minicom -D /dev/ttyS0 -b 9600
# For Raspberry Pi ZERO\2B
sudo minicom -D /dev/ttyAMA0 -b 9600
The default baud rate is 115200, and if the setting baud rate is 9600 plus -b 9600, -D represents the port, /dev/ ttySO is similar to the COM1 of the windows. If it is not Raspberry Pi 3, it should be minicom -D /dev/ttyAMA0, and then connect the module to the Raspberry Pi.

Exit: Ctrl + A and then independently press X, YES and Enter.
Example Demo
- Download the demo:
wget  https://files.waveshare.com/upload/f/f4/L76X_GPS_HAT_Code.zip
unzip L76X_GPS_HAT_Code.zip
sudo chmod 777 -R L76X_GPS_HAT_Code
cd L76X_GPS_HAT_Code/RaspberryPi
- C demo:
cd wiringPi
make clean
make
sudo ./main
- Python demo
cd python
sudo pip3 install pynmeagps
sudo pip3 install gps3
sudo python3 main.py
- Expected Result
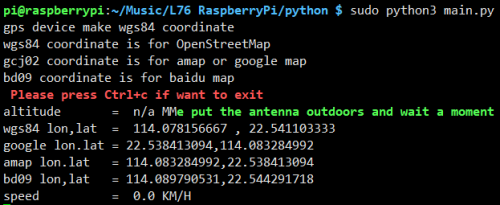
It takes 35 seconds for the module to be positioned for the first time. The front is the raw data output by the module. Time is the time output by the L76X GPS Module. Latitude and longitude are the output latitude and longitude and the directions of latitude and longitude. You can go to Baidu Coordinates System for the latitude and longitude position of the program that needs to be replaced, for example, 116.307629, 40.058359 should be changed to: 40.058359, 116.307629 (Baidu Coordinates System puts the longitude first).


