RGB LED HAT (B)
| ||
Introduction
True color RGB LED HAT (B) for Raspberry Pi, colorful display, 8 × 8 grid.
| More |
Description
WS2812B is an intelligent external control LED integrating the controlling circuit and lighting circuit. Its appearance is the same as a 5050LED lamp bead with each element as a pixel. The interior of the pixel includes an intelligent digital interface, data latch signal, shaping and amplifying drive circuit, as well as a high-precision internal oscillator and a 12V high-voltage programmable constant current control part, which effectively ensures that the color of the pixel light is highly consistent.
The data protocol adopts the communication method of the single-line return-to-zero code. After the pixel is powered on and reset, the DIN terminal accepts the data from the controller. The 24bit data sent first is extracted by the first pixel and sent to the interior of the pixel. The remaining data is shaped and amplified by the internal shaping processing circuit and then forwarded and output to the next cascade pixel through the DO port. After the transmission of one pixel, the signal is reduced by 24 bits. The pixel adopts automatic shaping and forwarding technology (Please refer to "data transmission protocol"), so that the cascaded number of the pixel is not limited by the signal transmission, but only limited by the signal transmission speed.
Data Transmission Protocol
Sequence Chart
- Data transfer time( TH+TL=1.25µs±600ns)
| T0H | 0 code, high voltage time | 0.4µs | ±150ns |
| T1H | 1 code, high voltage time | 0.8µs | ±150ns |
| T0L | 0 code, low voltage time | 0.85µs | ±150ns |
| T1L | 1 code, low voltage time | 0.45 µs | ±150ns |
Data Transmission Method
Note: The data of D1 is sent by MCU, and D2, D3, and D4 are transmitted through pixel internal reshaping amplification.
Color Format
There are many color formats, commonly used RGB888, RGB565 and so on. RGB888: R: red (Red), G: green (Green), B: blue (Blue), represents 8-bit data. Therefore, to transmit a complete color data, 24 bits are required. WS2812B uses this format, but the color data he sends is G-R-B, so when we send it again, we need to convert our RGB to GRB:
Note: Send the high data first, and the data is sent in the order of GRB.
User Guides of Raspberry Pi
How to use
Enable the terminal of Raspberry Pi and install the following libraries:
sudo pip install rpi_ws281x
Download the sample program, extract it to the specified directory, and run:
wget https://files.waveshare.com/upload/b/b2/RGB_LED_HAT.zip
unzip RGB_LED_HAT.zip
sudo chmod 777 -R RGB_LED_HAT
cd RGB_LED_HAT
sudo python3 ws2812.py
If the library is installed successfully, you can see the RGB LED flickering.
If you are using RGB LED HAT (B), you need to modify ws2812.py, or the number of lights is not complete, as follows:

- If the LED displays the wrong color, please add the lines below into the file /boot/config.txt, and restart the Pi to take the effect.
- RGB LED adopts DMA control, which may occupy the video output DMA channel on the Raspberry Pi. Therefore, adding these lines may cause the earphone connector unusable.
hdmi_force_hotplug=1
hdmi_force_edid_audio=1
Web Control with Bottle
On the premise of ensuring basic use, execute the following command:
sudo apt-get install python3-bottle
cd RGB_LED_HAT/web/
sudo python3 main.py
If you are using RGB LED HAT (B), you need to modify main.py and change LED_COUNT to 64.
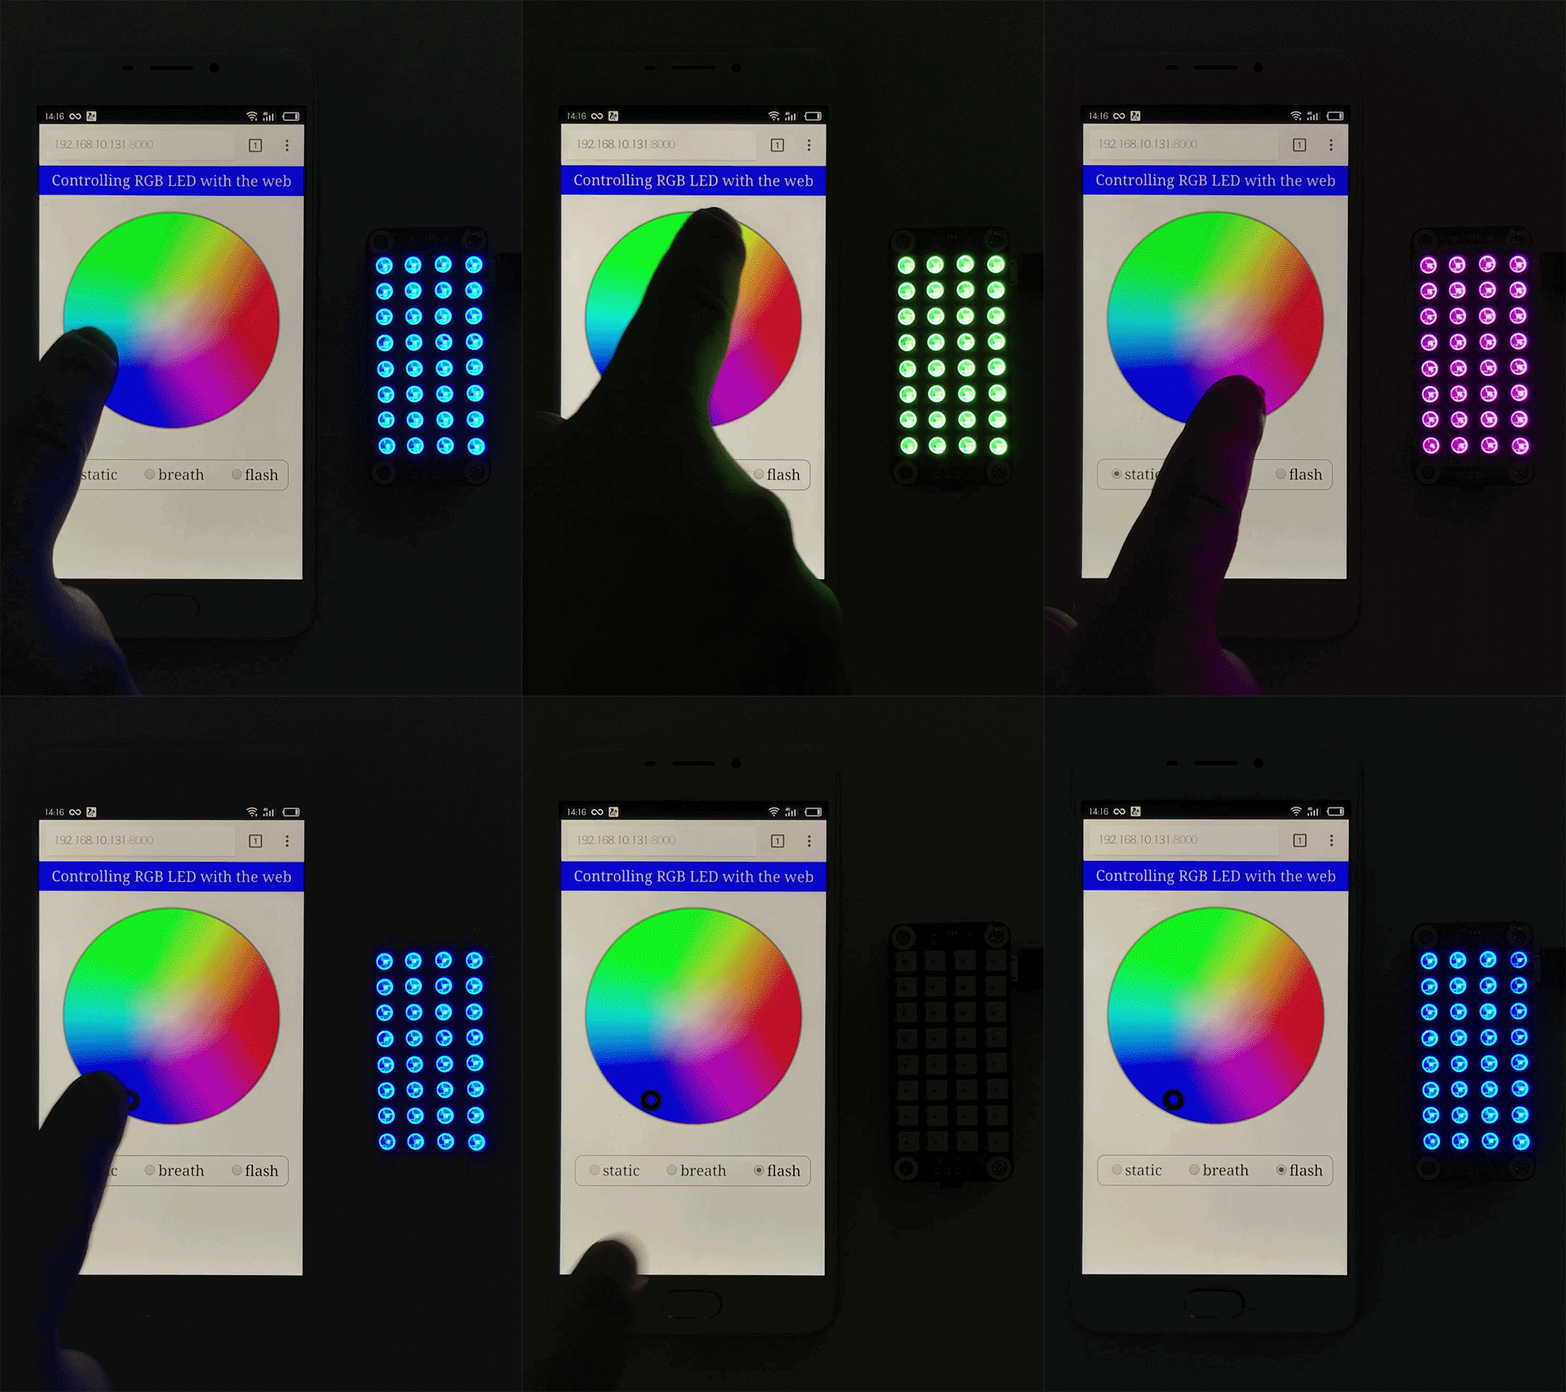
Then, enter the IP address of your Pi and port number 8000 into the address bar of the browser. Clicking different positions of the palette, the LEDs will display different colors. There are 3 display modes selectable, static, breath, and flash.
Take RGB LED HAT as an example, the actual demonstration effect:

Resources
Documentation
Software
Others
FAQ
{{{5}}}
1. Connect the RGB LED HAT separately for testing.
2. Replace with a new system.
{{{5}}}
Support
Technical Support
If you need technical support or have any feedback/review, please click the Submit Now button to submit a ticket, Our support team will check and reply to you within 1 to 2 working days. Please be patient as we make every effort to help you to resolve the issue.
Working Time: 9 AM - 6 PM GMT+8 (Monday to Friday)


