IMX179 8MP USB Camera (B)
| ||
Overview
Specification
- Pixels: 8MP
- Resolution: 3264 × 2448
- Sensor: IMX179
- DSP: Automatic white balance(AWB)/Automatic exposure control(AEC)/Automatic gain control(AGC)
- Camera Specifications:
- CCD size: 1/3.2inch
- Aperture (F): 2.0
- Focal length (EFL): 3.8mm
- Field of View (FOV): 75°
- Interface: USB2.0
- Image Format: MJPEG, YUY2
- Working temperature: 0°C ~ 50°C
- Dimension: 9mm × 62mm
- OS Support: Windows, Linux
Working with Windows PC
Test Software
Most of Windows 10 PC has pre-install Camera software, you can use it to test the USB camera.
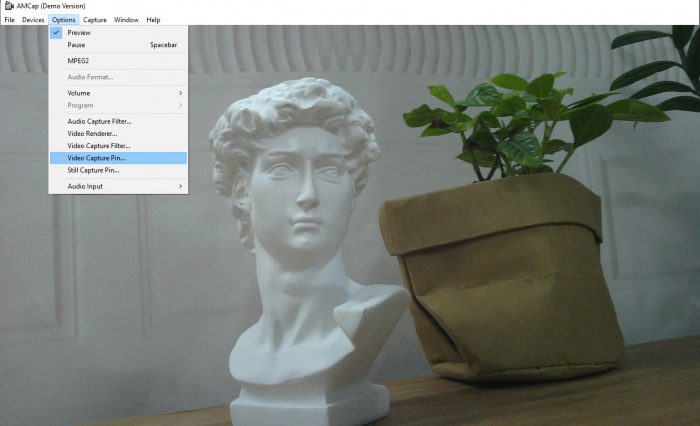
If you're using Windows 7, or you can't find the camera software on your system, you can also download the AMCap test software from Resource->Software and test.
Testing
- Use Camera Software of Windows
- Search "Camera" and open the software.
- Click the setting icon on the top left to configure the resolution for the image/video.
- You can click the icons on the right to switch between Image Capture or Video Recording.
- AMCap Software
- Download and install the AMCap software.
- You can click the Options option, and choose Video Capture Pin... or Still Capture Pin... to configure the parameters of image/video.
Working with Raspberry Pi
Buster
- Open a terminal of Raspberry Pi (You can use the Ctrl+Alt+T shortcut):
- Edit the modules file:
sudo nano /etc/modules
- Add the following command in the document and save:
bcm2835-v4l2
- Ues command sudo raspi-config to open the configuration:
- Choose Interface Option -> Camera -> Yes to enable the camera and reboot.
Bullseye
You can directly test the USB camera on the Bullseye system.
Camera Test
- Open the terminal of Pi and install the luvcview software with the following command:
- sudo apt-get install luvcview -y
- After installing, use the following command to test the USB camera.
- sudo luvcview -s 1920 x 1080
Working with Jetson Nano Developer Kit
- Open the terminal of Jetson Nano Developer Kit (You can use the Ctrl+Alt+T shortcut or open it by Mouse).
- Use the following command for previewing:
- nvgstcapture-1.0 --camsrc=0
- With the command, a preview window is opened.
【Notice】You may need to use the camera by script/codes, in this case, you can refer to tools/libraries like Opencv yourself.
Resource
Document
Software
FAQ
Do not touch the components on the back of the PCB with your hands, so as not to affect the electrical characteristics.
{{{5}}}
Normally, the module would generate a lot of heat during use.
{{{5}}}
If you are using a Mac system and Opencv, some parameter settings are not available, so we recommend using a Linux system and the V4L2 driver.
{{{5}}}
The OV5640 5MP USB Camera supports the UVC protocol, which is a standard for USB video devices. This means it should be compatible with most software that can interface with USB cameras. However, we have not tested with LabVIEW.
{{{5}}}
Regarding the maximum USB cable length, USB 2.0 has a maximum cable length of 5 meters for data transfer without the use of hubs or signal boosters.
{{{5}}}
Support
Technical Support
If you need technical support or have any feedback/review, please click the Submit Now button to submit a ticket, Our support team will check and reply to you within 1 to 2 working days. Please be patient as we make every effort to help you to resolve the issue.
Working Time: 9 AM - 6 PM GMT+8 (Monday to Friday)


